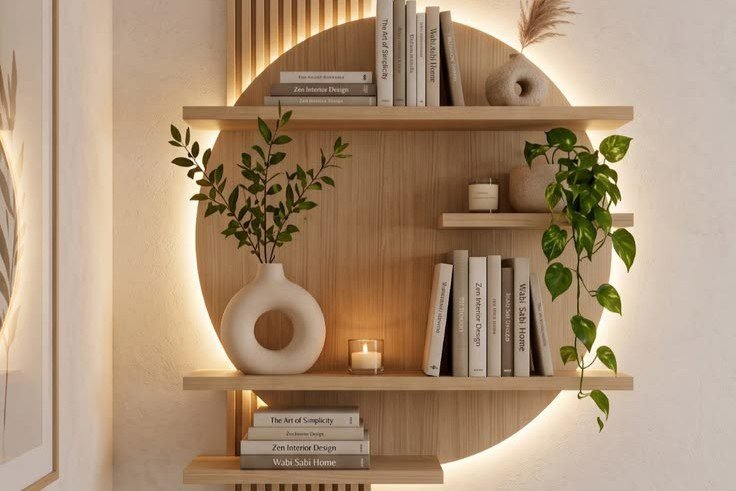
DIY Modern Curved LED Slat Wall Shelf
Turn your ordinary wall into a warm, modern focal point with this DIY wood slat accent wall with curved LED lighting and floating shelves. This design combines natural wood, soft lighting, greenery, and open shelving to create the kind of statement wall that makes a room feel professionally designed.
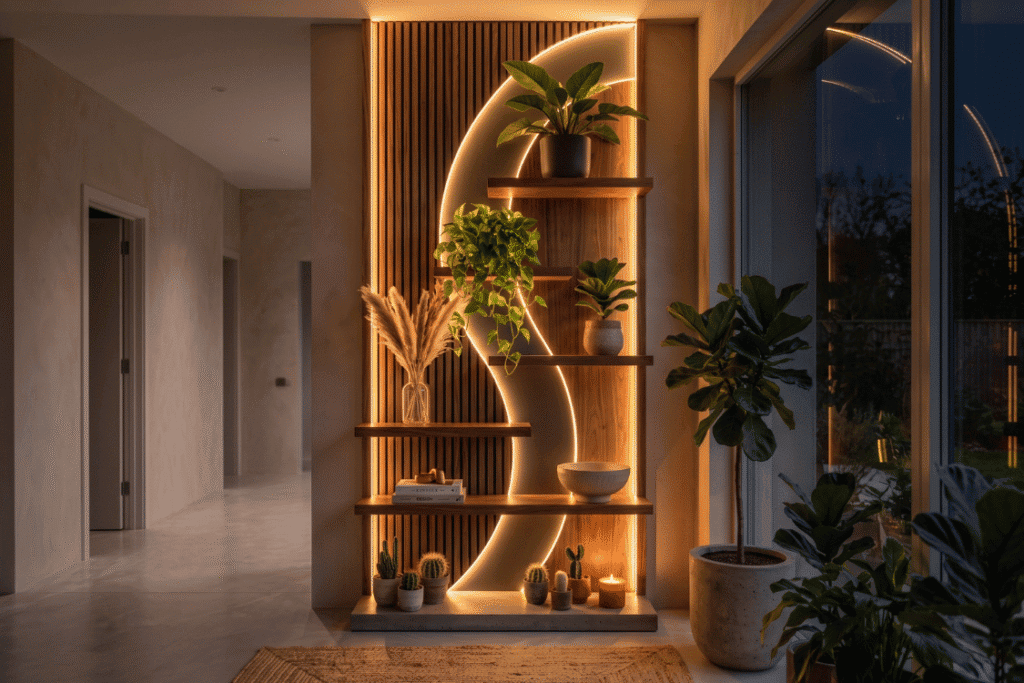
The good news is that you do not need to build the entire feature from scratch in one complicated piece. With a wood-slat panel, a few shelves, flexible LED strip lighting, and carefully planned framing, you can recreate the look at home.
DIY difficulty: Moderate
Estimated time: 1-2 days
Best for: Living rooms, entryways, bedrooms, home offices
Style: Modern, contemporary, Japandi, warm minimalist
Disclosure: This article doesn’t contain any referral links or affiliations. You have been shown all the products as examples.
Materials You’ll Need
- 3/4″ plywood or MDF sheets (example product)– this becomes the backer panel you’ll cut your curve into.
- Wood slat wall panels (example product)- enough to cover your full wall height on both sides of the curve.
- Flexible LED neon strip (example product)- regular LED strips only bend in one direction and neon flex rope lighting bends smoothly in an S-shape.
- 5 floating shelf boards (example product)- thick hardwood or hardwood-veneered plywood, walnut tone to match the photo.
- Concealed/blind floating shelf brackets (example product)- this is what gives shelves that “no visible support” floating look.
- Wood stain (walnut shade)- and a matching or contrasting paint for the curve panel.
- Construction adhesive and wood screws (example product).
- A concrete paver, poured concrete slab, or concrete-look tile for the base plinth.
- Heavy-duty wall anchors or a ledger board for stud mounting.
Tools You’ll Need
- Tape measure, pencil, level
- Jigsaw (get it here) and a router (if you want a recessed LED channel)
- Drill/driver
- Orbital sander (get it here
- Clamps
- Stud finder
- Paintbrush
- Safety glasses and a dust mask
Step 1: Decide and Measure Your Wall Size
Measure your wall’s height, width, and depth before buying anything. This build runs floor-to-ceiling, so your panel size is largely set by your room. Check for outlets, switches, or trim in that section, since they’ll affect cord placement later. Then mark your outline on the wall with painter’s tape to confirm it looks right before you cut anything.
Step 2: Sketch Your Curve at Full Scale
Rather than eyeballing an S-curve on the final panel, draw it first on a large sheet of paper or cardboard at full size. Tape this template to your wall to check proportions before committing to a cut. Transfer the curve onto your plywood/MDF backer panel using this template.
Step 3: Cut the Curve and Route the LED Channel
Cut along your curve with a jigsaw, sanding the edge smooth afterward.
If you want the recessed-channel look, use a router with a straight bit to carve a shallow groove along the curve, sized to fit your LED channel. Go slowly and in multiple light passes rather than one deep cut. This is the step where a steady hand matters most.
Simplify it: if you don’t have a router or don’t want to attempt it, skip this step entirely. Instead, mount the neon flex strip directly on the surface using its adhesive backing and small mounting clips along the curve. You’ll get the same glowing line effect without carving anything.
Step 4: Paint the Curve Panel
Paint the curved section a contrasting color (a warm grey works well against walnut-toned wood, as in the photo) before installing the slats around it. Let it dry fully.
Step 5: Install and Test the LED Neon Flex
Fit the neon flex strip into your routed channel (or clip it to the surface if you used the simplified method), following the full curve from top to bottom.
Test it now, before mounting anything to the wall. Confirm the whole run lights evenly and there are no dead spots, and double check where the power cord will exit and reach an outlet. Plan this before the panel goes up.
Step 6: Build Out the Slat Sections
Cut your slat wall panels to fit the sections on either side of the curve, mitering the inner edges where they meet the curve so they follow its shape cleanly rather than leaving a straight-edge gap.
Attach the slats to your backer panel with construction adhesive and fine finish nails.
Step 7: Mount the Full Panel to the Wall
This assembly is heavy and runs floor-to-ceiling, so treat it like built-in furniture, not a lightweight decor piece:
- Screw a ledger board into your wall studs at the top and bottom of the panel.
- Hang the panel on the ledger board, then secure it further with screws into as many studs as you can hit.
- If part of the panel falls between studs, use anchors rated for its full combined weight. The panel plus shelves plus plants and books add up fast.
For a panel this size, it’s worth having a second person help hold it steady while you secure it.
Step 8: Add the Floating Shelf Hardware
Mark shelf positions at staggered heights along the curve, matching the photo’s look. Shelves tucked right where the curve creates a natural pocket.
Install your concealed floating shelf brackets into the wall studs or backer panel (not just the slats), following the manufacturer’s spacing instructions for the rod-style hardware.
Step 9: Cut, Notch, and Finish the Shelf Boards
Hold each shelf blank up to its position and mark where it needs to be cut or notched to fit snugly against the curve. These will likely all be different shapes, not simple rectangles.
Drill the mounting holes to match your concealed bracket hardware, then sand and stain each board to match your panel.
Step 10: Attach the Shelves
Slide each shelf onto its concealed brackets and secure accordingly. Test that each shelf is stable before loading it with decor.
Step 11: Build or Place the Base Plinth
For the concrete platform look at the bottom, your realistic options are:
- A single large concrete paver or hearth stone, cut to size at a stone/masonry supplier
- Concrete-look porcelain tile mounted on a plywood base, which is lighter and easier for a DIYer to install than poured concrete
- A genuinely poured concrete slab, if you’re comfortable working with concrete forms — this is the most authentic option but adds real time and weight
Step 12: Style Your Shelf Wall
You can furnish as your liking. Here are some ideas:
- Group a few small potted cacti and succulents along the base plinth
- Add one taller leafy plant on an upper shelf for height
- Let a trailing plant like pothos spill over a middle shelf
- Add a stack of design books and a bowl or vase on the lower shelves
Pro Tips for DIY
- Draw your curve full-scale before cutting. Small proportion mistakes are much easier to fix on paper than on plywood.
- Choose neon flex LED, not standard strip lighting, for any curve tighter than a gentle arc.
- Mount into studs wherever possible; this build is genuinely heavy once finished.
- If the router step feels intimidating, use the surface-mounted LED method instead. The visual difference is minor, but the difficulty difference is significant.
- Consider hiring a carpenter just for the curve-cutting and panel assembly if you don’t have router experience, then handle the staining, lighting, and styling yourself.
Final Thoughts
This build is a genuine piece of art although this build can take 1-2 days to make with the right tools or the right help for the trickiest parts. Follow the guide, and don’t be afraid to simplify the lighting method if the full routed-channel look feels like too much for a first attempt.